ARE YOU READY TO START PLANTING?
Here we are in mid-March. Up to this point, our winter has been the perfect storm. We have experienced a mild winter with just a few frigid days. And we have had weekly rainfall. Our ground soil is moist and warm for this time of year. So many of you, including myself, are ready to get outside and start doing some new planting in the gardens and containers.
There is a lot of wisdom in the title of my blog. Many issues with a plant’s performance can be avoided by simply planting correctly.
So—what does a $100.00 hole look like? Here in Central Virginia, we deal with clay-heavy soil. This clay soil is the driving force in needing to dig a $100 hole. We need to amend this clay soil with organic matter and compost when planting. This is true not only for shrubs and trees but also when planting perennials, annuals, and vegetables.
HERE ARE THE STEPS TO TAKE WHEN PLANTING THIS SPRING
- Pre-water your plants thoroughly while they are still in their pots or rootball. By pre-watering, you are ensuring that the plant’s root system is well-watered before planting.
- If your plant is container grown, carefully remove it and examine the rot system. In many cases, the roots are matted and growing in a circle. I want you to loosen the root system so the roots will know to start extending outward. Sometimes you may need to use a knife and “score” the sides to loosen the tangled roots. Loosening the roots will allow water and nutrients to flow easily throughout the entire root structure.
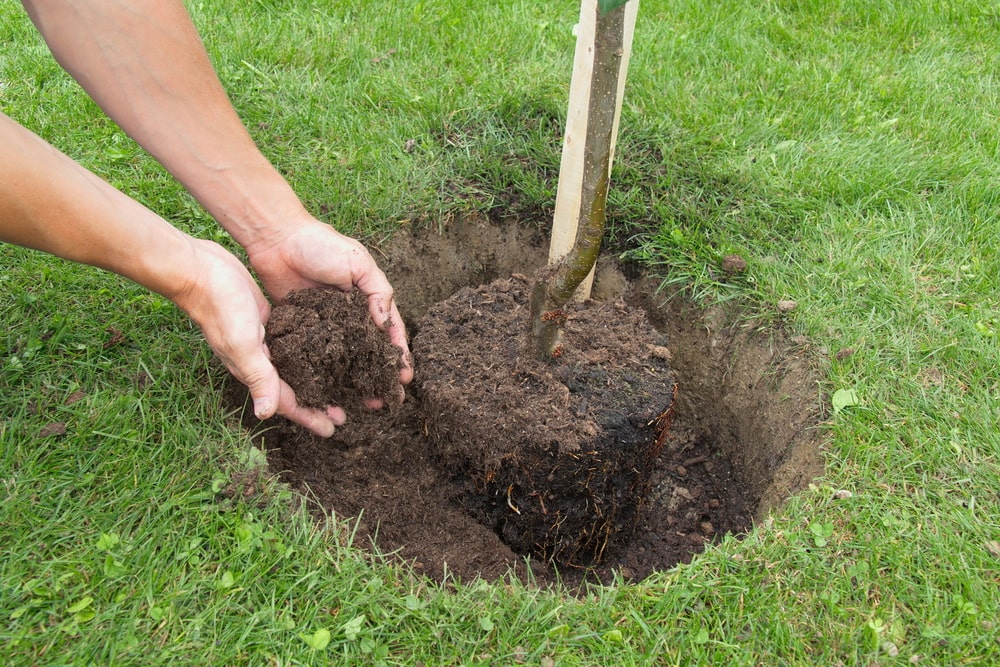
- Plants grown with a burlap ball should not be disturbed. You want to water the root ball, remove any twine that may be tied around the trunk, and fold back the burlap away from the trunk to expose the actual top of the root structure.
- Dig your hole two to four times as WIDE as the plant’s root system BUT no deeper than the root system itself. The roots of plants tend to grow shallow and outward, and the amended soil will support this growth habit. We recommend having some of the roots slightly HIGHER out of the hole. Remember, “PLANT IT HIGH, IT WON’T DIE. PLANT IT LOW, IT WON’T GROW.” Without a doubt, with all my years in the nursery business, the most common cause of plant failure or death is that the plants were not planted properly and, in many cases, planted too deep. Remember, “ROOTS ARE ROOTS, AND STEMS ARE STEMS.” Stems or trunks of plants are meant to stay above ground and cannot be buried under soil or mulch. Stems of plants planted too deeply will eventually rot, leading to a slow, lingering death.
- Once the hole is dug, now is the time to amend the soil with some good organic matter such as compost, composted cow manure, garden soil, etc. You want to ‘blend” this organic soil and cut it into the clay soil until it is enriched and loose. At this time, we recommend adding ESPOMA ORGANIC BIO-TONE into the hole. Bio-tone is an organic product that helps to promote root growth and development. I do not plant anything without using Bio-Tone. What a wonderful product.
- Most new plantings require about an inch of watering two to three times per week for the first couple of months. Try to hand water early in the morning to minimize evaporation.
- Mulch the new plants a couple of inches thick. Be sure not to mound the mulch up against the plant’s stem. Mulch that is too thick could become matted and not allow moisture to penetrate down to the soil, and it could also block oxygen from getting to the soil and roots. Remember—mulch helps to hold in soil moisture, moderate the soil temperature, and reduce weed growth.
Follow these steps and enjoy how healthy your plants will be for years.
HAPPY GARDENING / PLANT A LITTLE HAPPINESS / HAPPY 2023