AS PROMISED IN LAST WEEKS’ BLOG – HERE IS INFORMATION TO HELP WITH YOUR PLANTING
There is a lot of wisdom in the title of this blog. Many issues with a plant’s performance can be avoided by simply planting properly.
FALL IS FOR PLANTING
My mission in writing this blog is solely educational and, in the end, to have all the plants that are going to be purchased and planted this fall to all be planted properly. Last week I mentioned how we in Central Virginia deal with clay heavy soil. This clay soil is the driving force in needing to dig a $100 hole and to amend our soil with compost when planting. This is true for not only shrubs and trees but also when planting perennials, annuals, vegetables, etc.
So – What does a $100 hole look like?
- Dig your hole 2 – 4 times as WIDE as the plants’ root system, but no deeper than the root ball to be planted. Roots of plants tend to grow shallow and outward, and the amended soil will support their growth.
- ALL OF US HERE AT THE GREAT BIG GREENHOUSE HIGHLY RECOMMEND ADDING ESPOMA BIO-TONE INTO THE HOLE AT THE TIME OF PLANTING. BIO-TONE IS AN ORGANIC PRODUCT THAT HELPS PROMOTE ROOT GROWTH AND DEVELOPMENT.
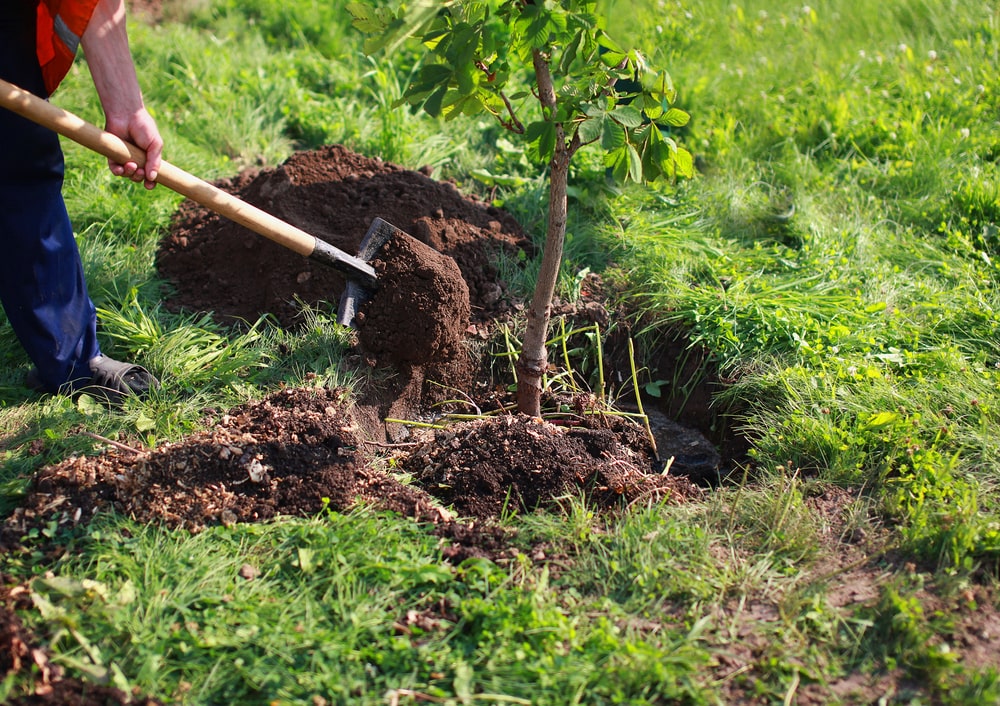
- Dig your hole NO DEEPER THAN the actual root system of the plant. In fact, I recommend planting having some of the roots slightly HIGHER out of the hole. Remember “Plant it high, it won’t die. Plant it low, it won’t grow.” Without doubt with all my years in the nursery business, the most common cause of plant failure or death is that the plants are being planted TOO DEEP. The soil was mounded up onto the trunk or stem of the plant. Remember ROOTS ARE ROOTS and STEMS ARE STEMS. Stems or trunks of plants are meant to stay above ground and cannot be buried under soil or mulch. Stems of plants planted too deeply will eventually rot leading to a slow, lingering death.
- Pre-water the plant thoroughly. By pre-watering, you are making sure that the root system of the plant is well watered before the actual planting.
- If the plant is container-grown, carefully take the plant out of the container and examine the root system. In many cases, the roots are matted and growing in a circle. I highly recommend loosening the root system to get them to stop growing in a circle and start growing outward. Sometimes you need to be aggressive to accomplish this feat and actually “score” the sides of the root system with a knife and loosen this tangled mess of roots. Loosening the root system will allow water and nutrients to easily flow throughout the entire root structure. Plants grown with a burlap ball should not be disturbed. You want to water the root ball, remove any twine that may be tied around the trunk, and fold back the burlap away from the trunk to expose the actual top of the root ball. For trees, the root flare should be level with the edge of the planting hole.
- Now set the plants’ root system in place. Once again, make sure that the top of the root system is slightly higher than the hole. Now you are ready to backfill the hole with the loose, amended soil. I always like to recommend water as you plant. The weight of the water will help compress the soil around the root system and get rid of any dry air pockets.
- Most new plantings require about an inch of watering 2 to 3 times per week for the first couple of months. Water in the early morning or in the evening to minimize evaporation. Watering is best done as one deep soaking to wet the entire soil area. You may need to add more watering once you get to know your soil. Stick your finger in the soil near the root system. If it feels damp like a sponge then hold off on watering for another day or so and check again.
- Mulch the new plants. Mulch only 2 or 3 inches. Be sure not to mound the mulch against the stem of the plant. Mulch helps to hold in soil moisture, moderate the soil temperature, and reduce weeds. Mulch can be anything from pine tags (straw), shredded pine bark, or shredded hardwood.
Follow these steps and enjoy how healthy your plants will be for years to come.
HAPPY PLANTING / HAPPY GARDENING / PLANT A LITTLE HAPPINESS
Thank you so much for these tips. I look forward to learn g more from you!
Linda,
Thank you for taking the time to share your kind comment. I am glad you enjoy my blogs. Have a great Labor Day weekend and remember, FALL IS FOR PLANTING. Doug
After more than 55 years of gardening and planting, this is the first time I knew that I should water the root ball before planting. I always gave it a good watering after it was in the hole. I guess I lucked out with my plants, great advice I will remember.
Mary,
Obviously, you love plants and gardening. I have been here with The Great Big Greenhouse for 42 years and it never seems to fail that each day I learn something new. I truly believe that this is one reason why I love this green industry. Watering as you plant is very important to the well being of a plant. Love your comment. Thank you so much for taking the time to share your thoughts. Take care, Doug
My farm hand did not add compost or good soil when he planted my crepe Myrtle trees—he just stuck them in the clay and covered them up a few weeks ago before all this heat. Is there anything I can do at this stage to increase their chance of survival??? Thanks, Jean
Jean,
Keep them watered through the fall. We have turned a little dry here the past couple of months. Do you have them mulched? If so, mulch will break down thus creating some good organic matter that will help the trees. I suspect that the trees will be fine. I hope I am right. Thank you for taking time to send me this message. Take care, Doug
Thank you for your great instructions. I lost my beautiful 20+ year old flowering cherry tree to a fungus that I suspect it caught from some nearby dying oak trees that had the same fungus. The sick trees were all removed this spring, as well as my dead cherry tree (and roots). Now I would like to plant a new tree in the place where the flowering cherry had been planted. Is there any special preparation I need to do to assure the soil is fungus free before planting a new tree? Thanks for any advice.
Nancy,
I would recommend just adding some good compost or organic matter to the existing soil. I don’t feel you need to be removing any soil. More importantly, is selecting a good flowering tree, whether it be another flowering cherry tree or some other spring flowering tree. Doug
I have a large potted GARDENIA BUSH . How long can I keep it in the pot? Will it last through the winter if placed in a sunny spot? Or should it be put in the ground ? If so in a sunny spot?
Cindi,
Thank you for your question. As you may know, not all varieties of gardenia plants are hardy in our area. With this said, unless the roots are coming out of the drainage holes I would suggest holding off on repotting until late winter (around the first of March). Yes, gardenias need sunlight and I would suggest placing this potted gardenia up against some structure, like the house, in order to give it some winter wind protection. Good question. I like it! Doug